Pruftechnik Rotalign Ultra IS
Pruftechnik Rotalign Ultra IS can measure the offsets between a train of bores and provide optimized alignment solutions for any configuration. Fix one or more bores or align to a differential profile, lets you use presets and targets. Ideal for internal combustion engines, piston compressors, crosshead guides, pumps, stern tubes and extruder barrels. Align steam and gas turbine internals, bearing rings, diaphragms, inner shells and casings.
No matter whether it is a motor-pump set or turbomachinery trains, ROTALIGN Ultra iS is a highly versatile system made to handle alignment on all types of rotating machines. This best-of-breed laser alignment system will save you a lot of time and effort!
With intelliSWEEP, you only get the best measurement results under any external and environmental conditions. Using a number of quality factors such as vibration and backlash, poor-quality measurement points are automatically filtered out.
Live Move enables one-step machine adjustments through the simultaneous monitoring of machine corrections in both vertical and horizontal directions with the sensor at any angular position on the shaft. Not only does this save a lot of time and effort but it is also extremely useful in case of restricted access to predetermined shaft positions.
Pruftechnik Rotalign Ultra IS modular system is easily configured with expert modules such as Vibration Acceptance Check, Live Trend for the monitoring of thermal growth, simultaneous multi-coupling measurement, RFID machine identification, and various geometric applications.
A class 1 Bluetooth module is integrated. PDF reports can be generated and directly saved from the system onto a USB stick. Our alignment software is used for preparing, analyzing, archiving measurement files and printing professional reports.
All-in-one: High-end system for shaft alignment and geometric measurements
- Hundreds of positions measured, automatic evaluation of measurement quality and filtering of measurement points: intelliSWEEP.
- Convenient alignment of uncoupled shafts: intelliPASS mode.
- One-step machine corrections: simultaneous monitoring of machine corrections in vertical and horizontal directions at any sensor position (Live Move).
- Handles any amount of misalignment (InfiniRange) including extra-large detector.
- Integrated Bluetooth module: no extra accessories required.
- Save measurement reports as PDF to a USB stick: no PC required.
Pruftechnik Rotalign Ultra IS Shaft Alignment System
At a glance:
- Real time quality by intelliSWEEP
- Always precise, accurate and repeatable
- 7-parameter sensor with High Definition PSD, XXL detector
- Any amount of misalignment can be easily handled
- Built-in vibration measurement
- Measure machine vibration before, during and after alignment, no need for additional hardware
- Environmental vibration monitoring
- Accurate shaft alignment under vibrating condition
- Precision built-in inclinometer through MEMS
- Used for backlash detection
- Communication to the sensor through the laser beam
- sensALIGN™ laser information readily available
- Integrated class 1 Bluetooth
- Wireless communication without additional accessories
- Rechargeable battery with latest LiPo technology and intelligent power management
- Long runtime without memory effect
Monitor Positional Change
Live Trend is a monitoring function used to analyze thermal or process-related machine positional changes during run-up and coast down phases, at the same time recording machine vibration.
Vibration Acceptance Check
The vibration check following the alignment ensures that the machine can be operated without restrictions. No additional accessories are required with ROTALIGN® Ultra iS.
ROTALIGN® Ultra iS
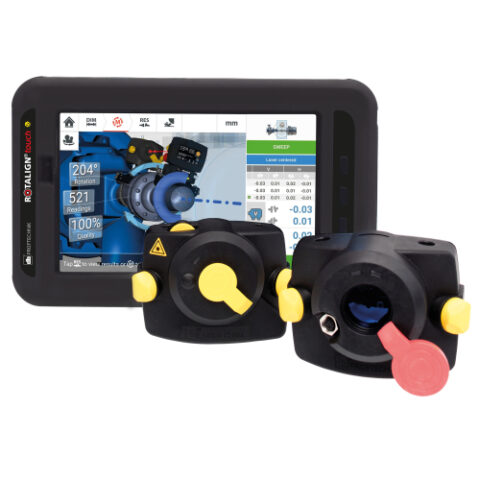
stands for ‘intelligent System’ – is a modular platform for a wide range of applications. ROTALIGN® Ultra iS is a combination of ROTALIGN® Ultra and the intelligent sensALIGN™ sensor and laser
RFID machine identification
An RFID reader and tag uniquely identify the machine; basic data is read out and written back after the alignment job. Data can be accessed with NFCenabled smartphones.
Machine train and multiple coupling
Align up to 7 machines simlutaneously and measure the alignment of up to 14 machines. See results graphically and to scale for all machines in the train.
Bore alignment
ROTALIGN® Ultra iS can measure the offsets between a train of bores and provide optimized alignment solutions for any configuration. Fix one or more bores or align to a differential profile, lets you use presets and targets. Ideal for internal combustion engines, piston compressors, crosshead guides, pumps, stern tubes and extruder barrels. Align steam and gas turbine internals, bearing rings, diaphragms, inner shells and casings.
Geometric applications
Accurate measurement of straightness, surface flatness, levelness, parallelism and perpendicularity.
Precision alignment pays
Good shaft alignment increases the mean time between failures (MTBF) and reduces power consumption. This saves you money. Better alignment also means less vibration and higher product quality.
Precision alignment guarantees
- Reduced energy consumption
- Reduction in bearing, seal, shaft and coupling failures
- Decreased bearing and coupling temperatures
- Reduced vibration
- Improved product quality
Advantages of laser shaft alignment
Easy to use single laser technology with patented continuous sweep measurement from PRÜFTECHNIK lets you take hundreds of readings, with the highest accuracy, under the worst of field conditions, ensuring fast yet easy alignments.
- User-friendly and intuitive
- Accurate and precise
- Take unlimited readings at any desired positions
- Measurement repeatability and documentation through a measurement table offering powerful data analysis capabilities
- Live monitoring of machine corrections in vertical and horizontal directions simultaneously
- Documentation and professional reports in color, with pictures and graphs
Specifications:
| CPU | Mavell XScale Processor running at 520 MHz |
| Memory | 64 MB RAM, 64 MB Internal Flash, 1024 MB Compact Flash Memory |
| Display | Type: Transmissive (sunlight-readable) backlit TFT color graphic display Resolution: Full VGA, 640 x 480 pixels; Dimensions: 145 mm/ 5.7 inch diagonal Keyboard elements: navigation cursor cross with up, clear and menu keys; Alphanumeric keyboard with dimensions, measure and results hard keys |
| LED indicators | 4 LEDs for laser status and alignment condition 2 LEDs for wireless communication and battery status |
| Power supply | Operating time: 25 hours (using Li-Ion rechargeable battery) 12 hours (using disposable batteries) typical use (based upon an operating cycle of 25% measurement, 25% computation and 50% ‘sleep’ mode) Lithium-Ion rechargeable battery: 7.2 V / 6.0 Ah Disposable batteries: 6 x 1.5 V IEC LR14 (“C“) [optional] |
| External interface | 2 x USB host for printer, keyboard or PC communication 1 x USB slave for printer, keyboard or PC communication RS232 (serial) for receiver I-Data socket for receiver Integrated Bluetooth® wireless communication, Class 1, transmitting power 100mW AC adapter/charger socket |
| Environmental protection | IP 65 (dustproof and water spray resistant), shockproof Relative humidity 10% to 90% |
| Temperature range | Operation: 0°C to 45°C [32°F to 113°F] Storage: -20°C to 60°C [-4°F to 140°F] |
| Dimensions | Approx. 243 x 172 x 61 mm [9 9/16” x 6 3/4” x 2 3/8”] |
| Weight | 1 kg (without battery) |
| CE conformity | EC guidelines for electric devices (2004/108 EEC) are fulfilled |




There are no reviews yet.